The following tutorial will show you how to install Yoda Addon On Kodi. The given instruction below also works on all Kodi supported platforms including FireStick, PC, Android box and Fire TV Cube.
In the past couple of months, many third-party Kodi add-ons and repositories have shut down because of strict copyright policies. However, we have seen some of the most popular add-ons making unexpected returns. Yoda addon was one of the best Kodi add-ons that worked perfectly fine but soon went down because of the closure of Supremacy Repository.
Now with a new repository, Yoda has made its comeback to the scene. With an updated content library and a new set of web scrapers, the Yoda add-on can now fetch high-quality streamable links for movies, TV shows, and documentaries at up to 1080p Full-HD. However, we recommend you to integrate your Real-Debrid account with the Yoda addon in order to watch 4K Ultra HD content. This will also ensure an overall buffer-free streaming experience. Trakt users can also link their account with Yoda Kodi addon to sync watch history and favorites.
Kodi users are delighted to see Yoda returning once again. Many Kodi build makers included it in their builds because of its content library. For those who are interested in installing the Yoda add-on on Kodi, following this guide will definitely help them do it easily.
How to Install Yoda Addon on Kodi
Contents
Most of the Kodi Addons/Builds, developed by third-party developers, will give you unrestricted access to a lot of movies and TV shows. However, you must be cautious while using Kodi Addons and safeguard your identity. There’s always a risk of being monitored or tracked by Internet Service Provider (ISP) and government. Usage of Kodi Addons and builds for streaming copyrighted content might land you in trouble. Therefore, it’s recommended to use a reliable VPN app for safety reasons.
Using a VPN connection will also help you in bypassing geo-based restrictions. We recommend our readers to use IPVanish VPN while streaming. IPVanish VPN cleverly hides your identity by masking your IP address. Additionally, it comes with a 7-day money-back guarantee, you can raise a refund request in case if you’re not happy with the service. Click Here for IPVanish VPN @ 69% Off
Installing third-party add-ons on Kodi requires you to install the repository that hosts the add-on. You will also need to enable unknown sources to bypass the signature check for verification. Kodi Leia users can check out the set of instructions below.
Enable Unknown Sources on Kodi
- Launch Kodi on your streaming device.
- Click the cogwheel icon above the sidebar on the left of the screen.
- Next, select System from the last row of options.
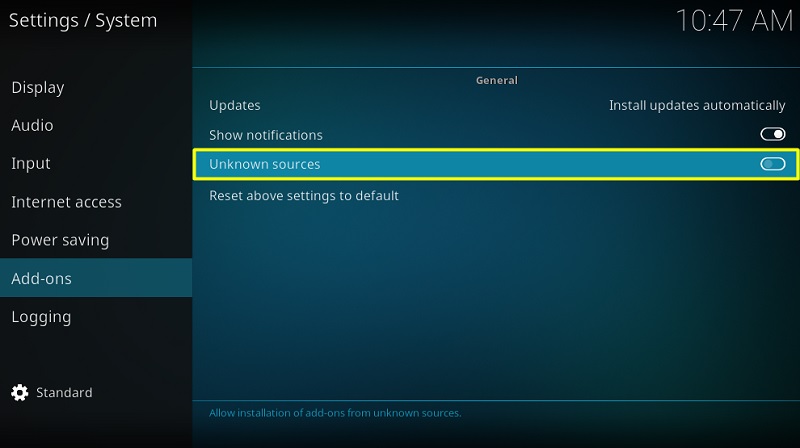
- Select the Add-ons tab, then toggle on Unknown Sources on the right.
- A window prompt will warn you about the possible outcomes of installing third-party Kodi add-ons. Click Yes to proceed as the Yoda add-on is out of harm’s way.
Install the Ghost Repository
- Return to Kodi’s System menu to open the File manager.
- Select Add Source from any side of the screen. A window should appear on the screen.
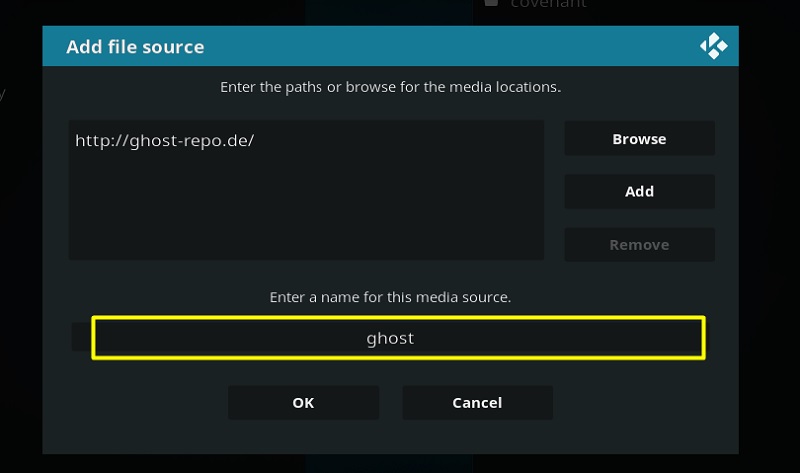
- Now click <None> and put the following link: http://ghost-repo.de in the text field. Click OK to go back to the window.
- Select the text field below and name the media source “Ghost”
- Once again, return to the System Menu and select Add-ons from the top row.
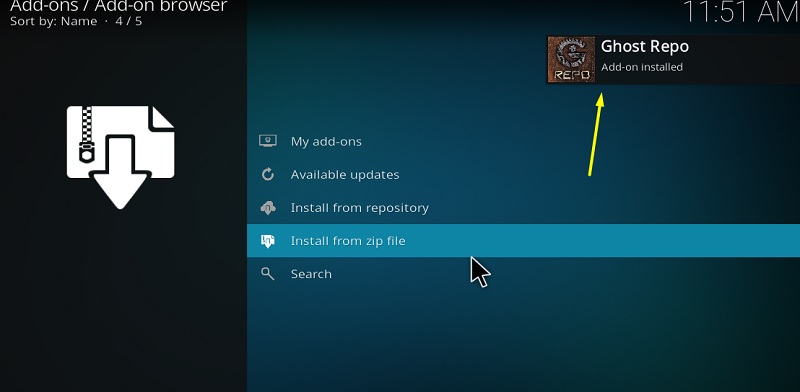
- On the Add-on browser page, click Install from zip file.
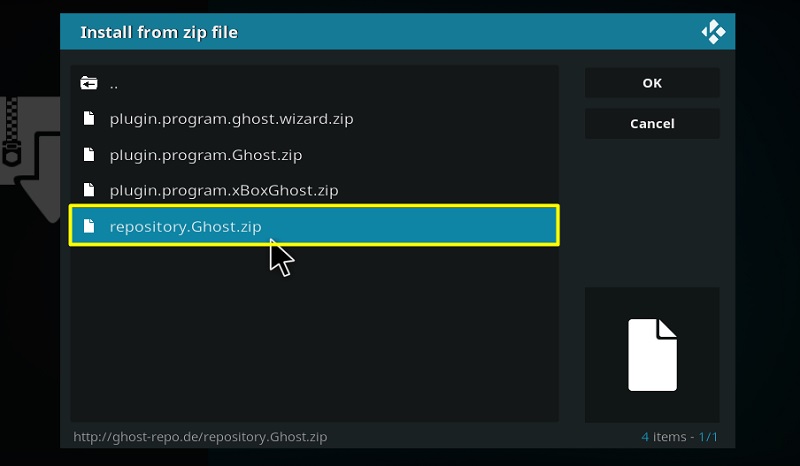
- Select the Ghost from the media sources.
- In the root folder, click repository.Ghost.zip.
- You will receive an “Add-on installed” notification soon.
Install the Yoda Kodi Addon
- Return to the Add-ons page.
- Select Install from repository.
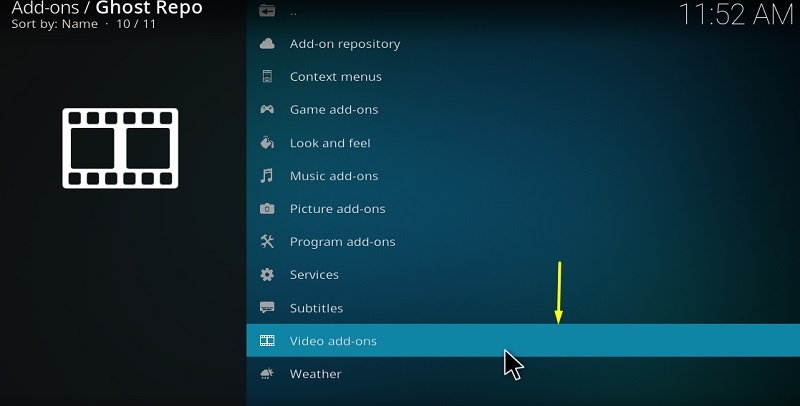
- After that, select Ghost Repo, and scroll down to find the Video add-ons
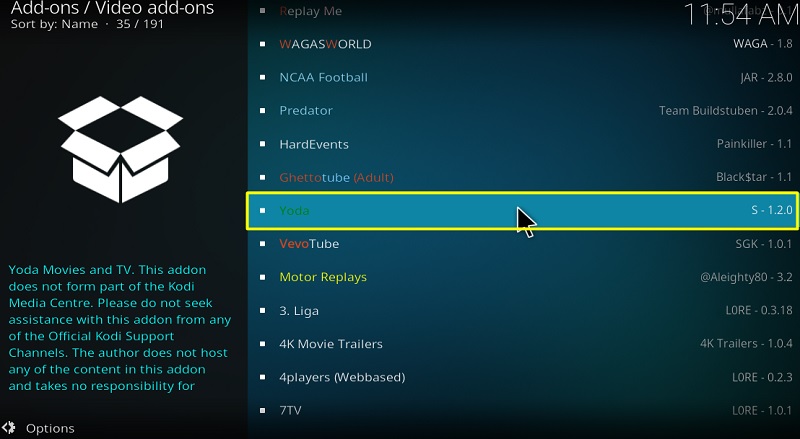
- Search for Yoda in the Video add-ons folder.
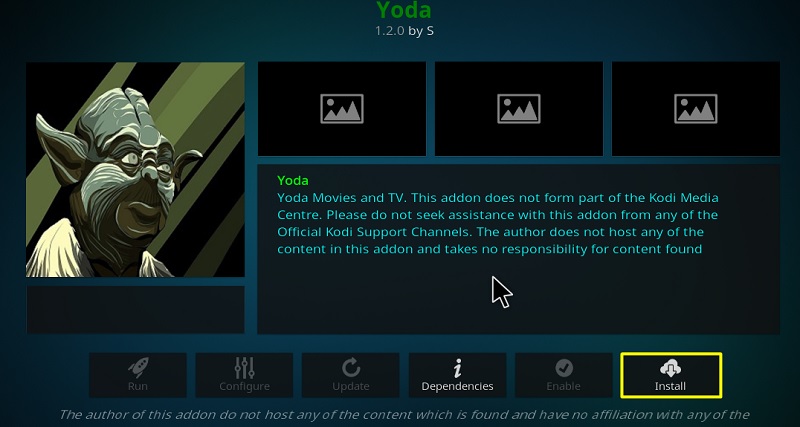
- Click the Install button under the add-on description.
- Click OK to install the required metadata, dependencies, and scripts for the Yoda add-on.
After a few minutes, the “Add-on installed” notification will show up. You can launch the Yoda add-on from the Add-ons section on the Kodi home screen.
Integrate Real-Debrid with the Yoda Kodi Addon
If you want the Yoda add-on to fetch more high-quality streamable links for your favorite movies and TV shows, then you should integrate your Real-Debrid account with it. Here’s how:
- Open the Yoda add-on from Add-ons > Video add-ons.
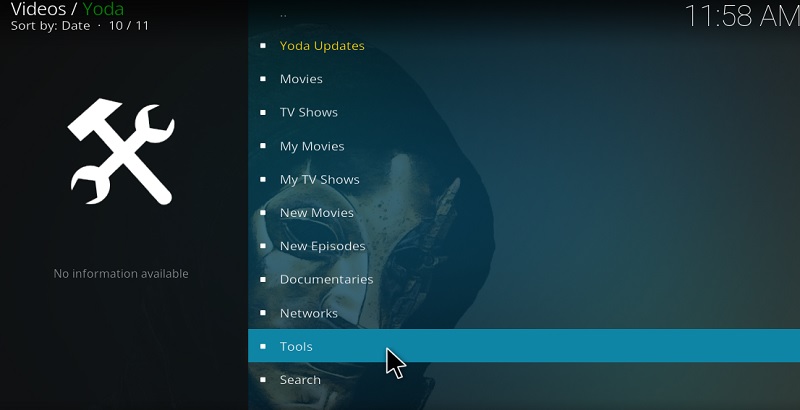
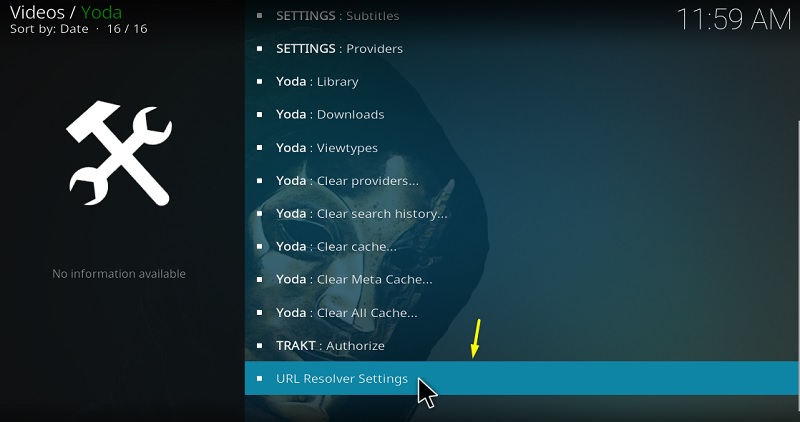
- Select Tools from the main directory of the add-on.
- Scroll down to select URL Resolver Settings.
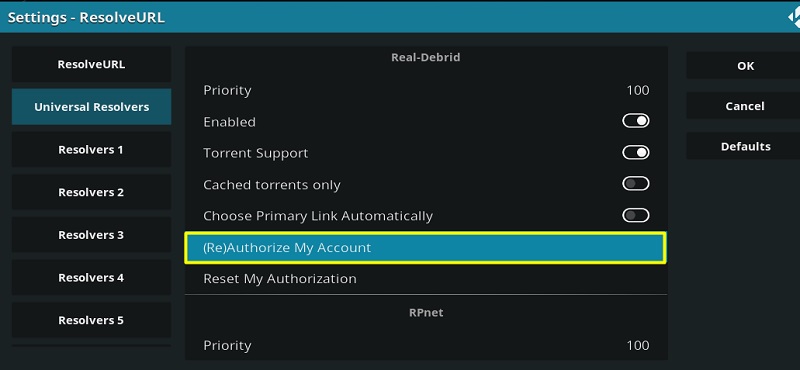
- Highlight Universal Resolvers tab on the left, then scroll down to the Real-Debrid section on the right.
- Select (Re)Authorize My Account under the Real-Debrid section.
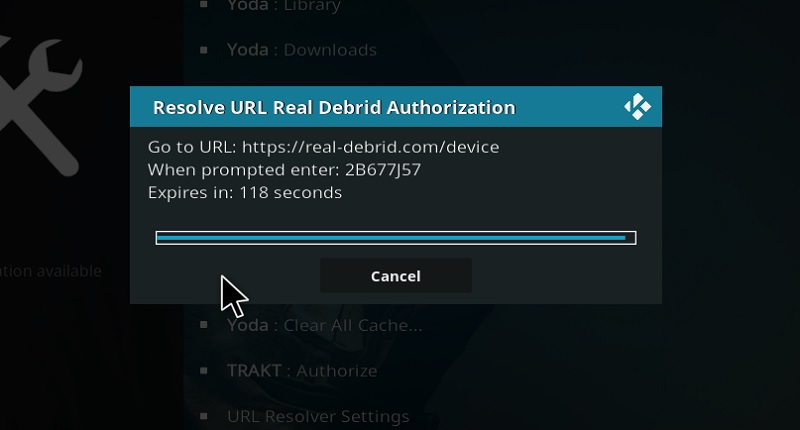
- A unique code will be generated, which will only last for 120 seconds. So make sure you follow the next steps as quick as possible.
- Visit real-debrid.com/device from a web browser.
- Enter the unique code displayed on Kodi, then click Continue.
If everything goes fine, you will get the “Real Debrid Authentication is completed” on Kodi. You can now watch your favorite movies and TV shows at the highest quality while maintaining a buffer-free streaming session.
Yoda Kodi Addon (Overview)
The Yoda is a very simple video streaming add-on that is suitable for both beginners and experienced users. It uses the default text-based Kodi interface as its medium.
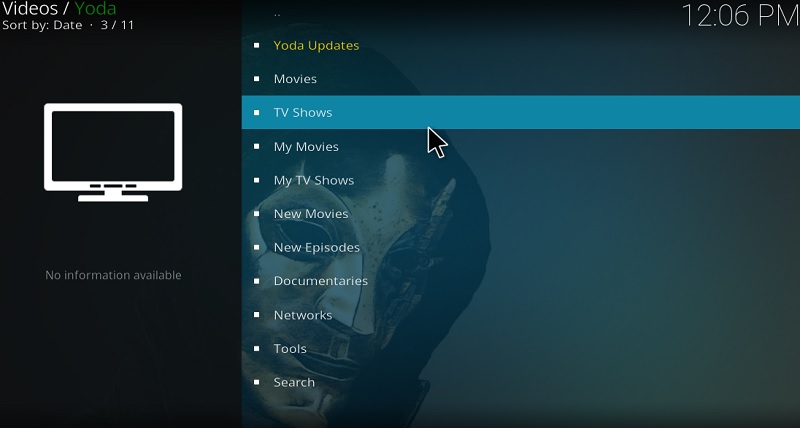
Opening the Yoda add-on will put you on the main directory. There are several options which are: Movies, TV Shows, My Movies, My TV Shows, New Movies, New Episodes, Documentaries, Networks, Tools, and Search. These options are self-explanatory and don’t need any further discussion.
To watch a movie or TV show, you can use the Search option to find your preferred content. Then it is a matter of seconds to select a streamable link and begin your streaming session.
Similar Articles
- How to Install Covenant Addon on Kodi
- How To Install The Crew Addon on Kodi
- How to Install Seren Addon on Kodi
Final Words
This guide summarizes the Yoda Kodi add-on and helps Kodi users install it on Kodi. We have also included instructions to integrate Real-Debrid with the Yoda addon. This guide works for all the operating systems that Kodi officially supports. In case you need help related to this guide, leave a comment below without any hesitance. We will quickly reach out to you with a reply.
