Gaia Addon is a third-party video add-on for Kodi that delivers high-quality premium links for movies, TV shows, documentaries, short films, and shows for kids. It is based on the same code as the Bubbles add-on.
It utilizes several torrents, file-hosting, and Usenet services, such as Orion, Real Debrid, Premiumize, RapidPremium, OffCloud, AllDebrid, EasyNews, and more. To take advantage of these services, users are required to register for the services and link the account with Gaia.
Thanks to the integration of several premium services, you have the flexibility to choose your preferred platform for streaming 1080p or 4K content on Kodi. You can also link your Trakt account to synchronize your watchlist and favorites from other streaming services.
The fifth iteration of Gaia brings a lot of new features, including a better cache buffer and auto-play. When you are streaming a TV show episode, the auto-play function loads up the next episode in the cache buffer. It fixes a few bugs related to the service-linking system as well.
If you are looking forward to installing Gaia addon on Kodi, this guide will definitely help you do it. You will also find extensive instructions for setting up the Gaia Kodi addon. The same tutorial also works for amazon firestick, android mobiles, PC, Firestick 4k and all other devices which support Kodi software.
How to Install Gaia Addon on Kodi
Contents
Most of the Kodi Addons/Builds, developed by third-party developers, will give you unrestricted access to a lot of movies and TV shows. However, you must be cautious while using Kodi Addons and safeguard your identity. There’s always a risk of being monitored or tracked by Internet Service Provider (ISP) and government. Usage of Kodi Addons and builds for streaming copyrighted content might land you in trouble. Therefore, it’s recommended to use a reliable VPN app for safety reasons.
Using a VPN connection will also help you in bypassing geo-based restrictions. We recommend our readers to use IPVanish VPN while streaming. IPVanish VPN cleverly hides your identity by masking your IP address. Additionally, it comes with a 7-day money-back guarantee, you can raise a refund request in case if you’re not happy with the service. Click Here for IPVanish VPN @ 69% Off
Installing Gaia add-on on Kodi is intricate. As it is a third-party add-on, you have to bypass signature verification and install the required repository in order to install the Gaia Kodi addon. The following step-by-step instructions show the installation process on Kodi Leia 18.x as well as Kodi Krypton v17.6.
#1. Turn on Unknown sources
- Boot up Kodi on your device.
- Click the gear icon right under the Kodi logo to open Kodi’s System menu.
- Select System (System Settings on v17.6) from the grid of options.
- Now highlight the Add-ons tab in the sidebar, and turn on Unknown sources.
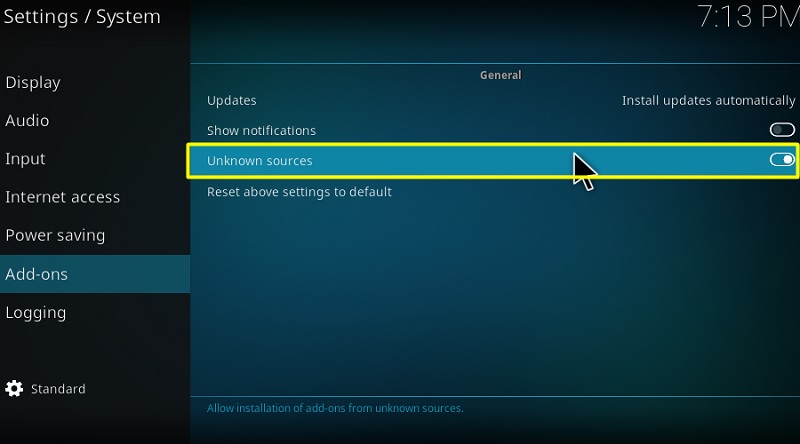
- Click Yes to proceed.
You can now install third-party Kodi add-ons without any restrictions.
#2. Install Gaia Repository
- Go back to the System menu and click on File manager.
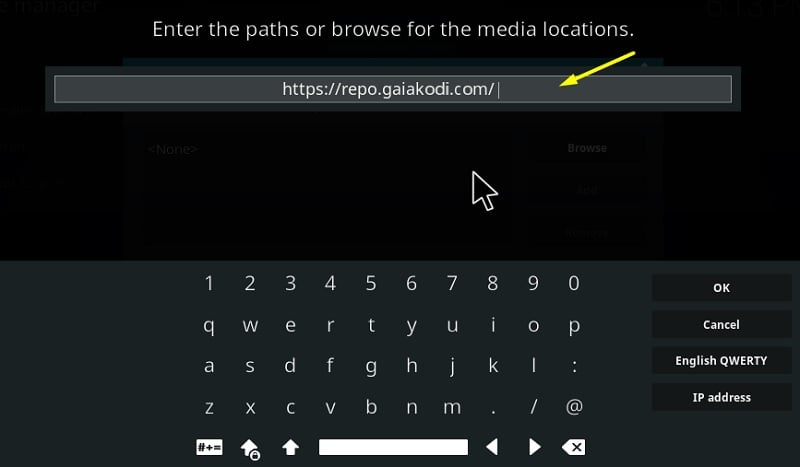
- Select Add source to open up the “Add file source” window.
- Click <None>, type https://repo.gaiakodi.com/, and click OK.
- Now select the next text field in the window and enter Gaia. Click OK.
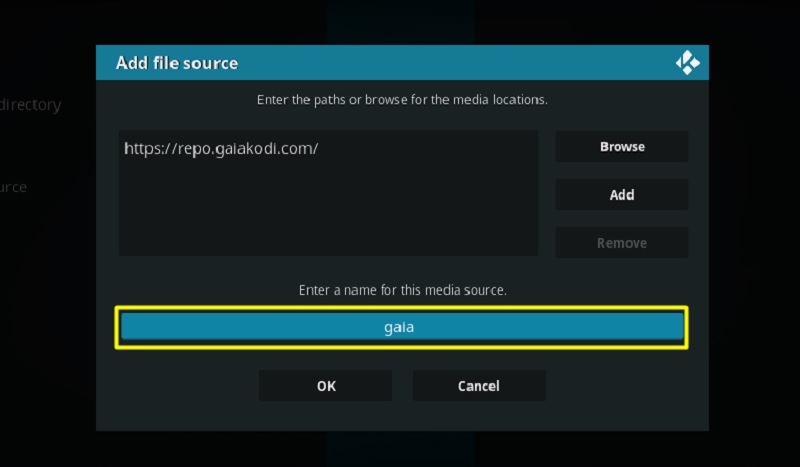
- Click OK again to add the file source for the repository.
- Return to the System menu once again to select Add-ons. On Kodi Krypton, head over to the Add-ons page from the Kodi home screen, then click the carboard box icon to get to the Add-on browser menu.
- After that, select Install from zip file and then choose Gaia from the list of sources.
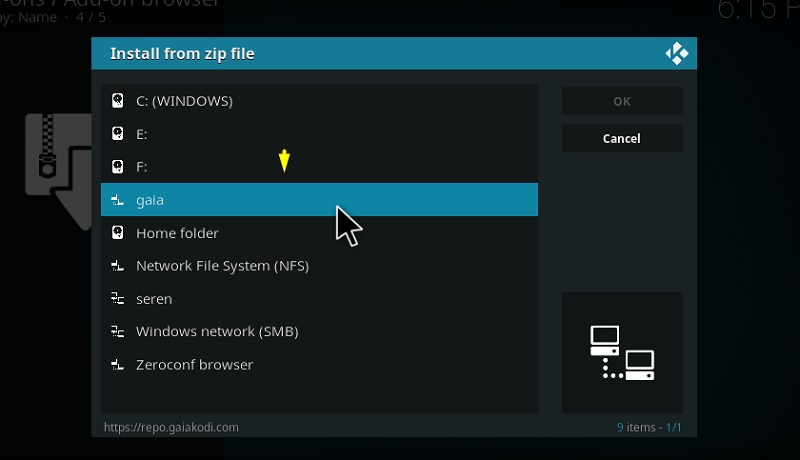
- In the root folder, select the repository.gaia.zip file.

Gaia Repository should be installed on Kodi in a few seconds.
#3. Install the Gaia Addon
Now that we have access to the Gaia Repository, let’s follow the final steps to install the Gaia add-on on Kodi.
- Select Install from repository in the same Add-on browser menu.
- Now click Gaia Repository and choose Video add-ons from the options.
- Select Gaia, and hit the Install, users will have to click OK again to confirm the installation.
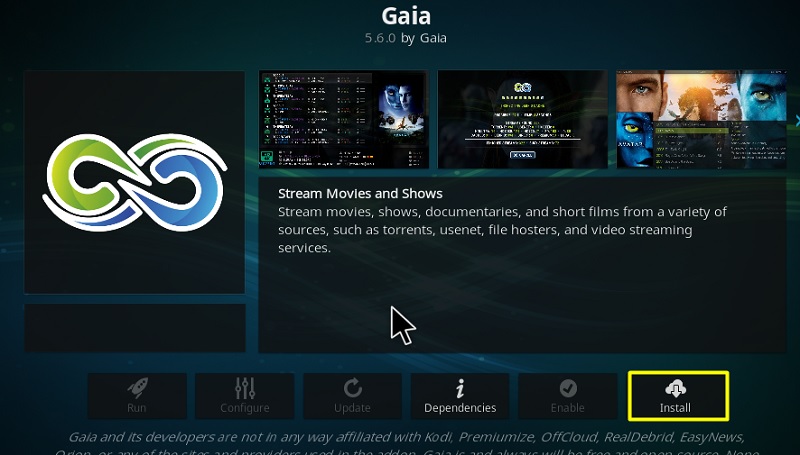
Once the “Add-on installed” notification pops up, return to the Kodi home screen, and go to the Add-ons page to launch the Gaia add-on.
Setting Up Gaia Add-on on Kodi
The Gaia addon includes a first-time configuration wizard that lets you adjust a few settings and link premium services before you start streaming. Simply follow the steps below.
- As you launch Gaia, you will encounter a splash screen, and then a small warning prompt. Click OK to continue.
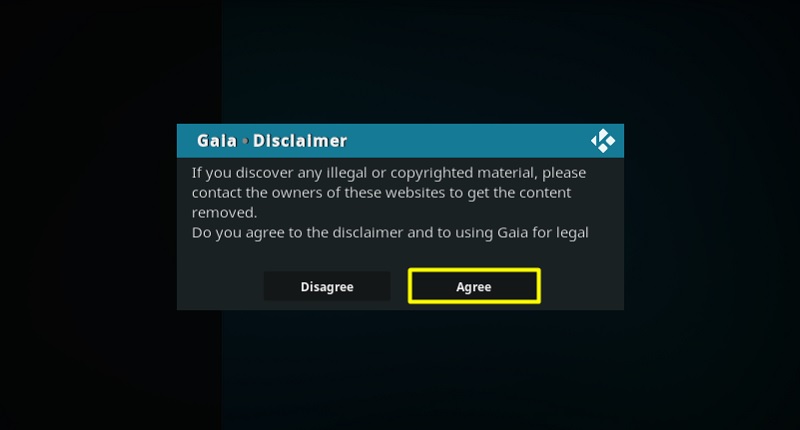
- After that, a Disclaimer window should show up. Click Agree.
- Click OK to begin the configuration wizard, and do it once again to skip the bug warning related to Kodi 18.
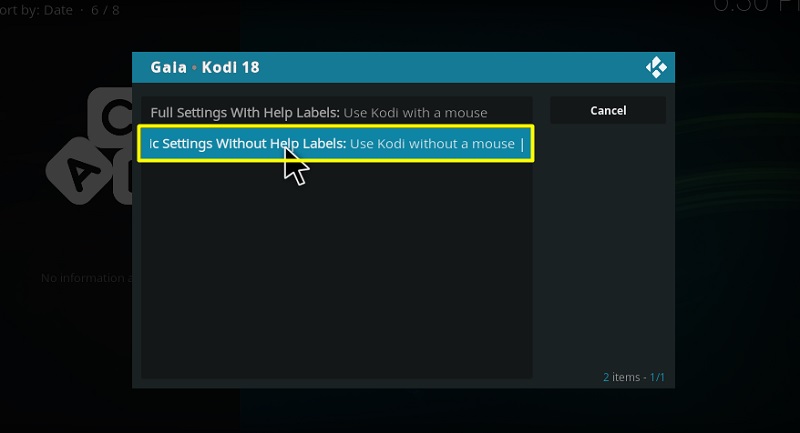
- On the next window, select Basic Settings Without Help Labels.
- Now select Reaper Setup from the setup modes, and click OK.
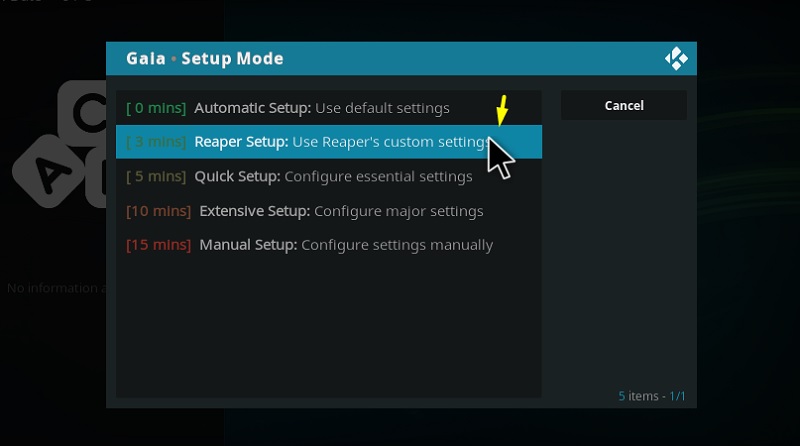
- Click YES to load the Reaper setup preset.
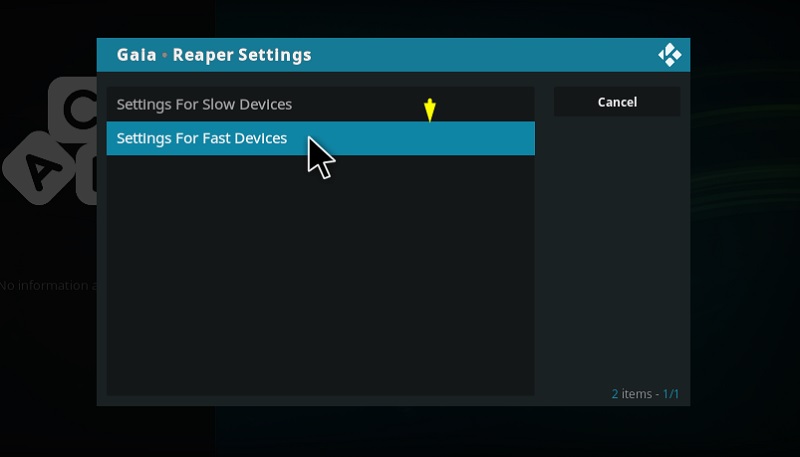
- You should encounter two options: Settings For Slow Devices, and Settings for Fast Devices. If you are using an entry-level Android box or a 2nd-gen Firestick, then select the first option. Otherwise, go with the second option.
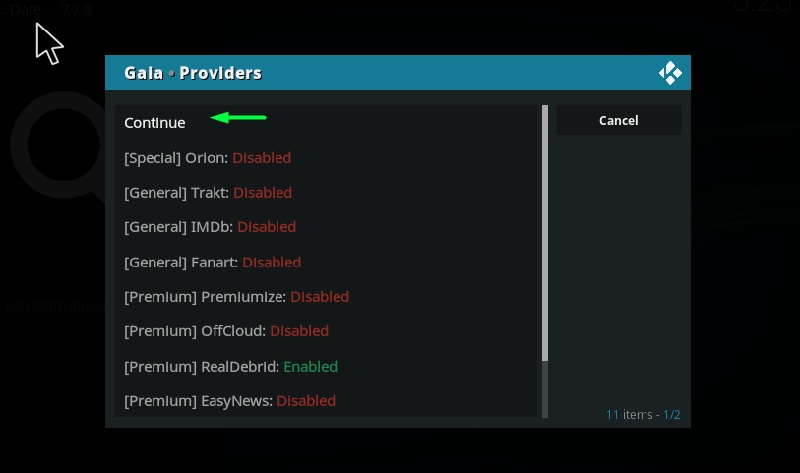
- Click Continue to get to the service-linking process.
- For reference, we are going to link our RealDebrid account with Gaia. It is also recommended to use this particular service because of its affordability and faster link scraping capabilities.
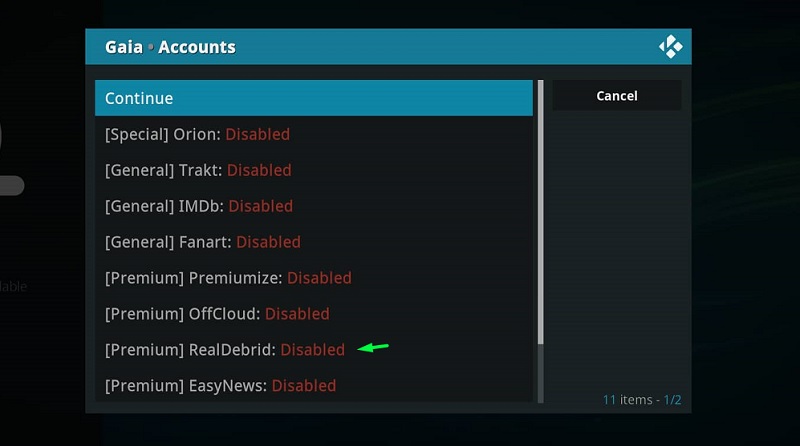
- After selecting RealDebrid from the options, click Activate Account.

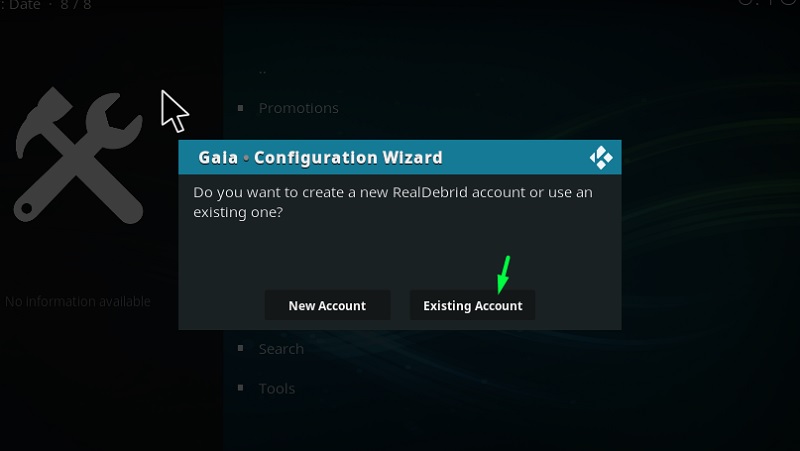
- Assuming that you already have a Real-Debrid account, proceed with Existing Account.
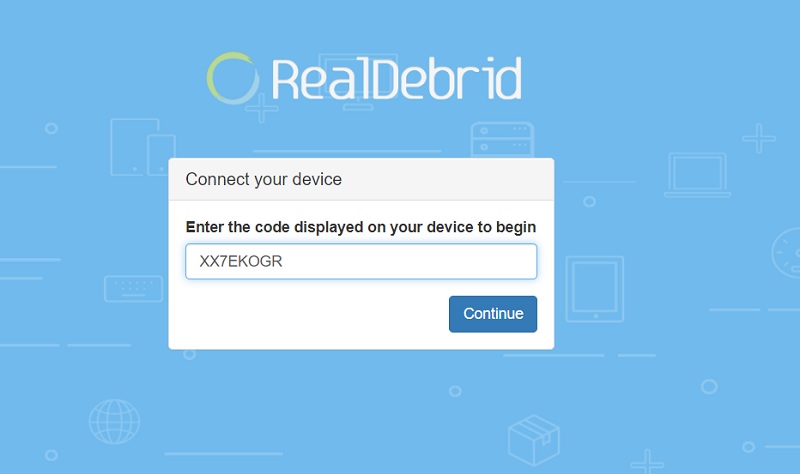
- An authorization token will be generated for your session.

- Open https://real-debrid.com/device from a web browser on another device.
- Enter the token in the empty box and click Continue. You will be asked to log in to your Real-Debrid account if you haven’t already.
- In a few seconds, you will get the “activation successful” message in Kodi. Click Continue.
- In case you want to link any other service, do it and click Continue.
- Click Continue once again to dismiss the message.
- In case you want to stream a selected content instantly, select Automatic. You can also select Manual to choose your preferred source for streaming manually.
- Click Finish to complete the configuration wizard.
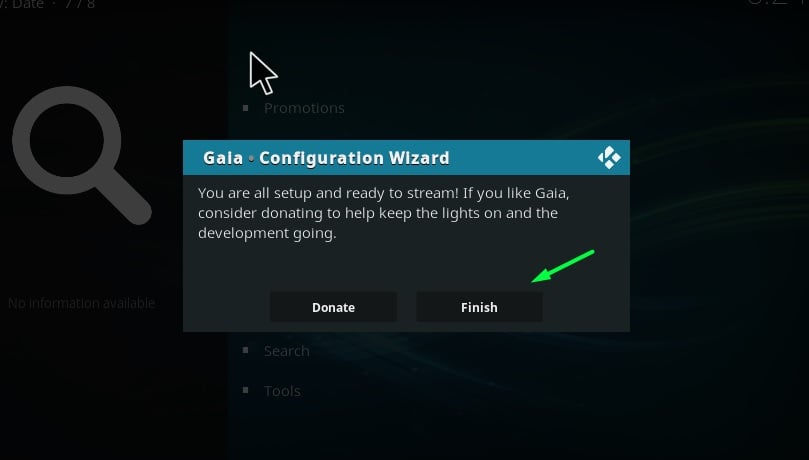
You can now enjoy streaming with Gaia add-on without any further tweaks.
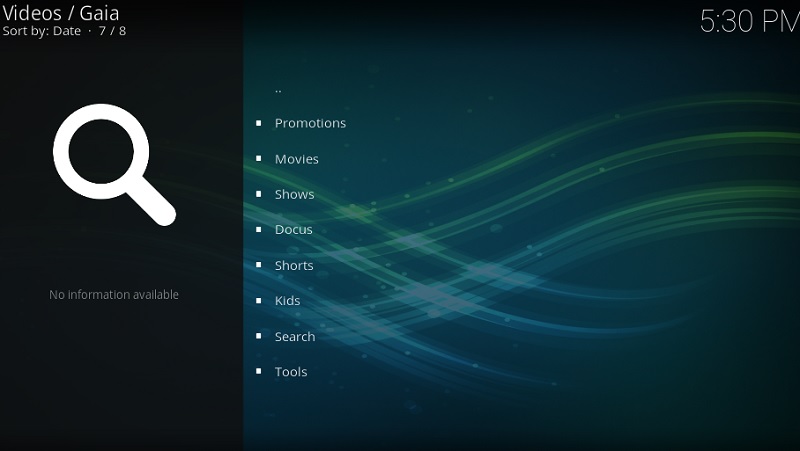
A Quick Tour of Gaia Kodi Addon
The home screen of Gaia add-on is pretty simple. Similar to other video add-ons, it uses Kodi’s default text-based user interface. The categories are also laid out in an organized manner. These are Promotions, Movies, Shows, Docus (documentaries), Shorts, Kids, Search, and Tools.
Selecting a content opens up a list of streamable sources. If you have Auto-play enabled, the stream will start playing in the highest quality possible.
The Search option is great for finding your favorite movie or TV show, as well as the Promotions section for new trailers and movie clips.
If you want to tweak something related to the add-on, there’s an extensive set of configuration tools in the Tools section.
Similar Articles
- How To Install The Crew Addon on Kodi
- How to Install Rising Tides Addon on Kodi
- How to Install The Magic Dragon Addon on Kodi
Verdict
Those who mostly use Kodi for content consumption, Gaia is a must-have add-on for them. You can also use Gaia without the premium hosting services, but your options for quality and high-speed sources become extremely limited. If you have managed to successfully install Gaia addon on Kodi by following this guide, we would love to hear about your experiences with the add-on through the comments below.