In this post, I will show you how to download and install IT addon on Kodi. The same guide also works on amazon firestick, windows PC, Firestick 4k and all other Kodi supported platforms.
IT Addon for Kodi is possibly the best replacement of 13Clowns you could find on the internet. It is rather unfortunate that 13Clowns had to be shut down since it was gaining a lot of traction and popularity in the streaming industry. The decision of shutting down 13Clowns addon disheartened most of the users, especially cinephiles. A lot of people have been searching for a reliable alternative to 13Clouwns for streaming Movies and TV shows over the internet.
Recently, I’ve come across the IT addon by Nobody which I found quite propitious, to say the least. If you’ve been a fan of 13Clowns, then you should definitely check out the IT addon as well, it has got a sizeable collection of popular Movies and TV shows all piled up in one place. Make sure to stick with the article to know the installation procedure of the IT addon on Kodi.
Use VPN While Using Kodi Addons
Contents
There’s absolutely no problem is using Kodi for streaming media content over the internet such as Movies, Music, Tv shows, etc. But, if you’re using a third party addon such as IT to stream non-licensed content on Kodi, then you might as well consider using a VPN connection to secure yourself on the internet. Although there are tons of VPNs available in the market, we found IPVanish VPN to be reliable and excellent in terms of service.
You might not be aware of it, but the content you’re streaming on Kodi using third party Addons will be visible to your ISP and other local authorities. In most of the countries, streaming non-licensed content is considered as piracy, which is punishable by law. Therefore, it’s always to have secured a VPN connection for streaming content on Kodi using addons such as IT, Exodus, etc.
IPVanish is a simple to use VPN that lets you experience a safer and more open internet without having to worry about your privacy. There’s also a trial offer running on the official website of IPVanish in case if you want to try out the service. In the trial period, you will get to use all the features of IPVanish for a specific period of time without incurring any charges.
How To Install IT Addon On Kodi
Installing the IT Addon on Kodi is fairly simple and wouldn’t take more than a few minutes to complete the process. But make sure to enable the “Unknown Sources” option from the Settings of your Kodi App. By default, the option will be disabled, you have to enable it by following the below steps to install third-party Addons on your Kodi App.
- Open the Kodi application and click on the Settings icon.
- Now Click on the ‘System Settings’ option
- Choose the ‘Addons’ option on the left then turn on the ‘Unknown Sources’ option.

- Once you will click on unknown sources option, you will get a prompt window, click on Yes.
Now you’re just one installation away from accessing the world of nonstop Movies and Tv shows from all over the world. Simply follow the below steps to install and get started with the IT Addon on your Kodi App.
- Open your Kodi software
- Click on settings icon from the top left side corner
- Click on File Manager
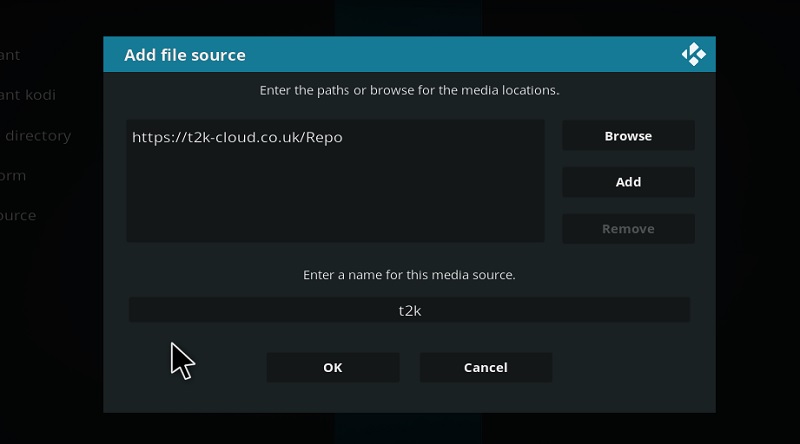
- Click on add source from the next screen
- Click on ‘<None>’ in the dialog box that pops up.
- Type in the source URL https://www.t2k-cloud.co.uk/Repo/ and click OK.
- Now enter a name for this media Source as the T2K
- Now Go back to the main (home) screen and click on ‘add-ons’
- Open the Package Installer (Addon Browser) from the top left of the next screen
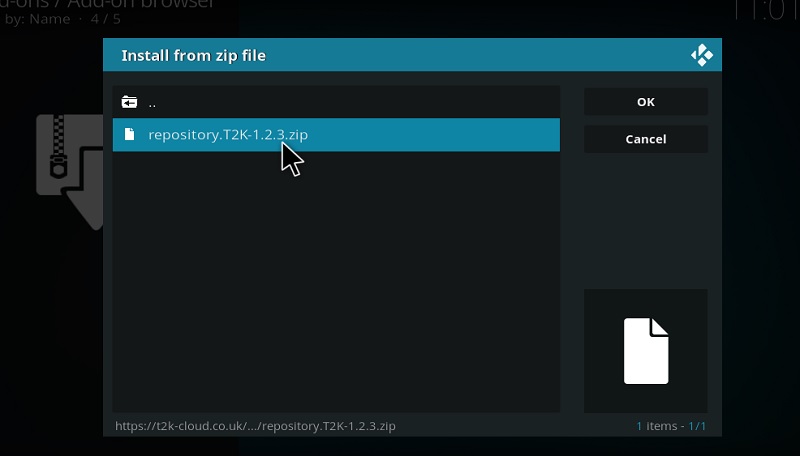
- Click on the ‘install from zip file’ option.
- Click on T2K
- Select repository.T2k-1.1.7.zip
- Wait for the Repository to download, a notification will appear.
- Now click on ‘install the repository’ on the same screen.
- Click on T2K Repo
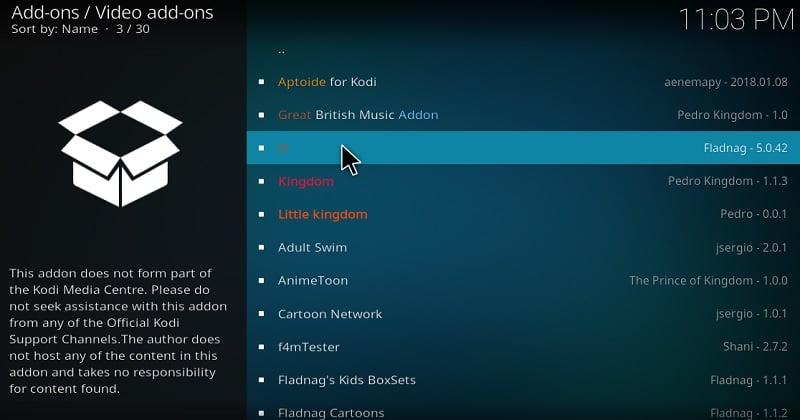
- Next, Open ‘video add-ons’
- Click on ‘IT’
- Click on Install and then click on Ok to allow dependencies
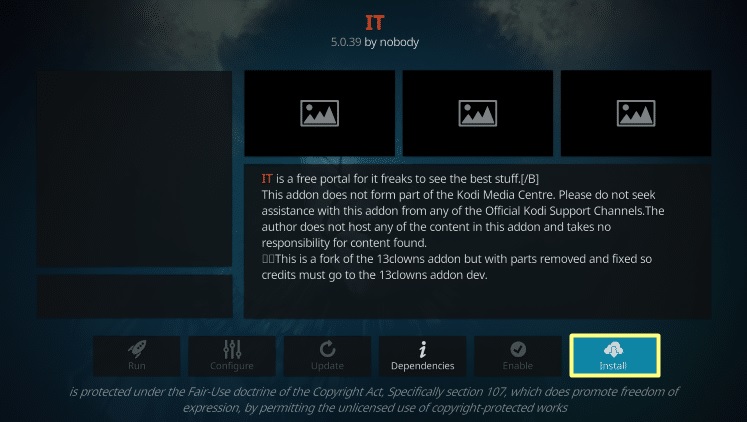
- You have successfully installed IT add-on on Kodi
The link you’ve pasted in the description box is the source path from where the IT addon will be installed onto your Kodi App within a few seconds. The installation process will complete within a few seconds after you’ve hit the “Install” option in the last step. You can find the IT Addon under Addons Menu after the installation is complete.
(This is not the official Kodi addon so do not post any question regarding this addon on official Kodi Forum)
How To Use IT Addon On Kodi
It’s possible that you may find IT add-on difficult to use on your Kodi App, especially if you’re new to the Kodi interface. It’ll take a while to get familiar with the interface and all of the options available in the Kodi App. Until then, you may check out the paragraph to know how to use the IT Addon on Kodi.
In general, streaming add-ons such as IT will be listed under the “Video Addons” tab. In order to access the IT Addon on your Kodi.
- Launch the Kodi App on your laptop or computer.
- Select the “Addons” option, which will be available in the left side of the interface.
- Open “Video Addons” Tab to get the list of installed addons on your Kodi App.
- Find the “IT” Addon from the list and click on it to open.
- Now select the category that you want to browse, Movies or TV shows.
- Sort the titles using search browsers and enter the title directly in the search field.
- Pick up any Movie or Tv show and wait for the Addon to scrap the sources.
- Select any Source from the provided list to start streaming the requested content.
Note:- Certain categories or genres such as Adults cannot be accessed directly straight after you install the IT addon on your Kodi. You can browse the restricted categories by acquiring a password from the developers of the addon. Follow up on the instructions provided on your screen to get the password through email.
Final Words
Don’t be surprised if you find the interface of 13Clowns and IT addon similar since the latter one is a fork of the former one. Make sure to drop your thoughts in the comments if you have found the article to be helpful in installing IT Addon on Kodi. Let us know if you have any further queries or doubts in the comments.