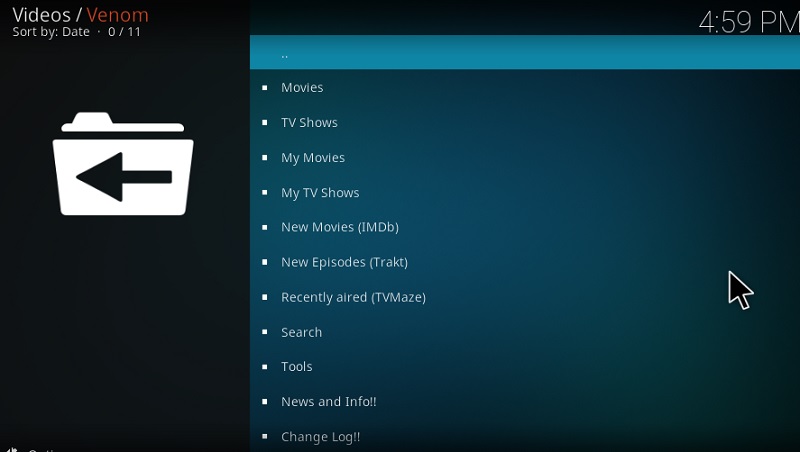
Venom is a simplified Kodi addon with a respectable collection of movies and TV shows. It is very barebones in terms of features, but it doesn’t make any difference for most people. If you are trying to find a lightweight add-on that works smoothly on your budget streaming device, then you should try Venom once. You can follow the installation guide in this article to install the Venom addon on Kodi.
Venom Kodi addon works on all the officially supported Kodi platforms, including Windows, macOS, Linux, Android, iOS, and Fire OS.
Venom Addon (Overview)
Contents
The Venom add-on is a cleaned up and trimmed down version of the popular Exodus add-on that works with both Kodi Krypton and Leia. It utilizes the scraper set from Open Scrapers and it gets regularly updated to the latest version. This gives you access to a wide variety of movies and TV shows. You also have the option to link your Real Debrid or Premiumize accounts for more streamable sources. Trakt integration is found on Venom too.
The Venom addon has a special feature called “Pre-emptive Termination” that automatically stops scraping for more streamable sources as soon it finds a defined number of sources per the user’s parameters. As a result, the movie/TV show episode you want to watch will auto-play at the highest quality possible (1080p or 4K) without going through the hassle for selecting a specific link. The feature is also available on other Kodi add-ons similar to Venom, but few of them work as great as Venom. It has Up Next integration, so the next episode begins to play automatically after the current one ends.
The creator of the Venom Kodi addon has done some further code-level optimizations to make everything quick. Some playlists and features from Exodus are completely missing from the Venom add-on and it is for good reasons. This makes menu load times significantly faster. New image compression methods are being also used to quickly load posters and screenshots. Overall it feels snappy and works like a charm on entry-level Kodi streaming boxes.
Streaming movies, TV shows or sports content from third-party Kodi add-ons/Builds leaves you at risk of exposing your private information to automated trackers and activity loggers. Everything you stream on Kodi is visible to your ISP and Government. You may also get into legal trouble for watching copyrighted content (Movies, TV Shows, Sports) for free.
Using a Good Kodi VPN protects you from others stealing your sensitive information. It masks your IP and encrypts the requested data packets through a filter of server stacks.
We strongly advise you to use IPVanish VPN While streaming, which currently holds the crown of the world’s fastest VPN. Just download the IPVanish app on your device, get a subscription, and you’re good to go. We are offering special discount for our Kodibee readers. Get IPVanish VPN Now
How to Install Venom Addon on Kodi
In case you are eager to try out the Venom Kodi addon, you can go through this installation guide. We have provided details for both Kodi v17.6 Krypton and v18 Leia to avoid confliction. The steps are divided into three parts so that you encounter any issues.
Part 1: Toggle on Unknown Sources
- Launch Kodi, then click the gear icon in the top-left corner of the screen. It is situated between the Power and Search The System page will appear.
- On Kodi v17.6 Krypton: Select System Settings.
On Kodi v18.x Leia: Select System.
- Select the Add-ons tab on the left window and toggle on Unknown sources on the right.
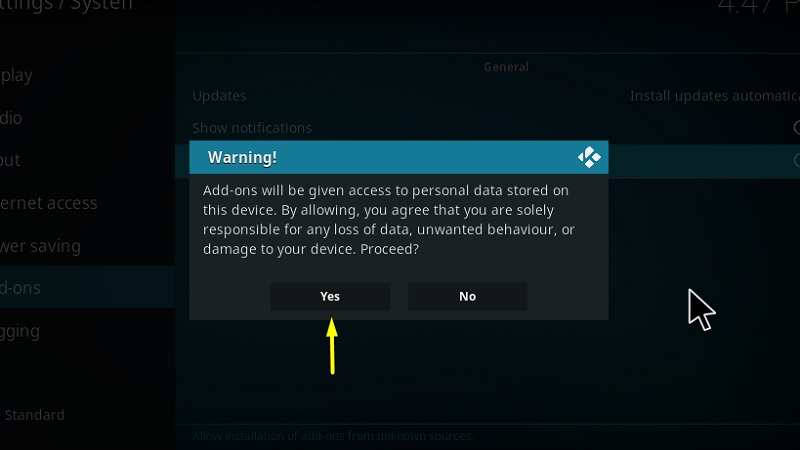
- To close the warning message, click Yes.
Part 2: Install the Venom Repository
- Get back to Kodi’s System page and select File manager.
- Choose Add Source, then select <None> from the window that shows up.
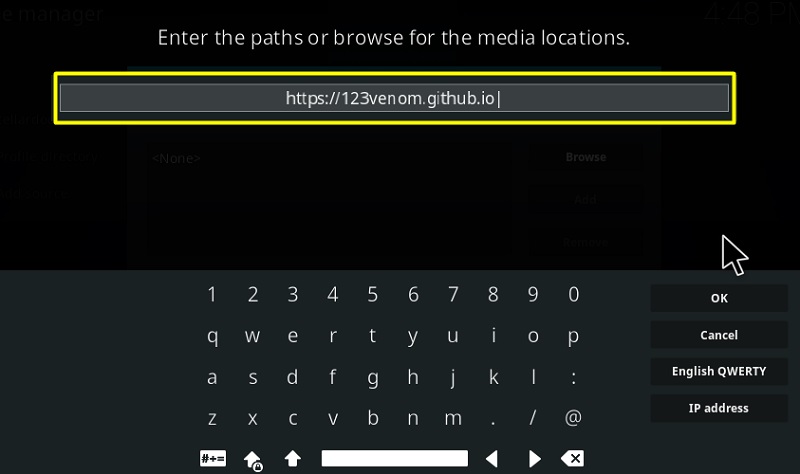
- Carefully type the following URL: https://123venom.github.io. This is the source of the Venom Repository. Click OK to save.
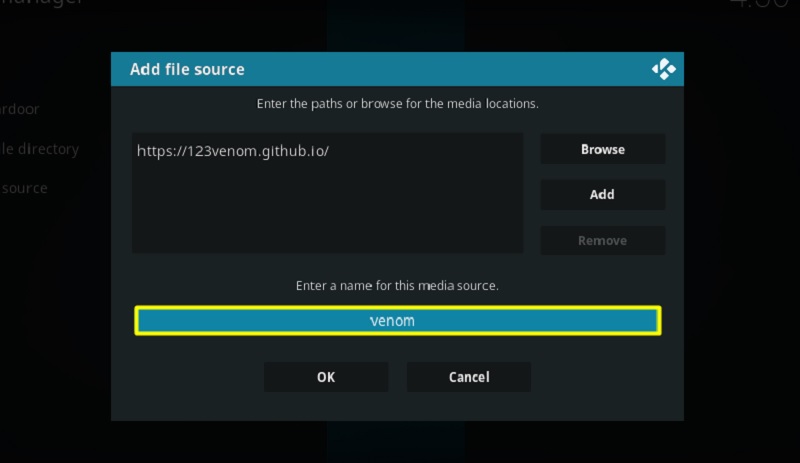
- Now highlight the text field below the pop-up window to rename the source “Venom.” Click OK to add the file source.
- On Kodi v17.6 Krypton: Go to the Kodi home screen > Add-ons, then click the opened-box icon from the left sidebar.
On Kodi v18.x Leia: System page > Add-ons.
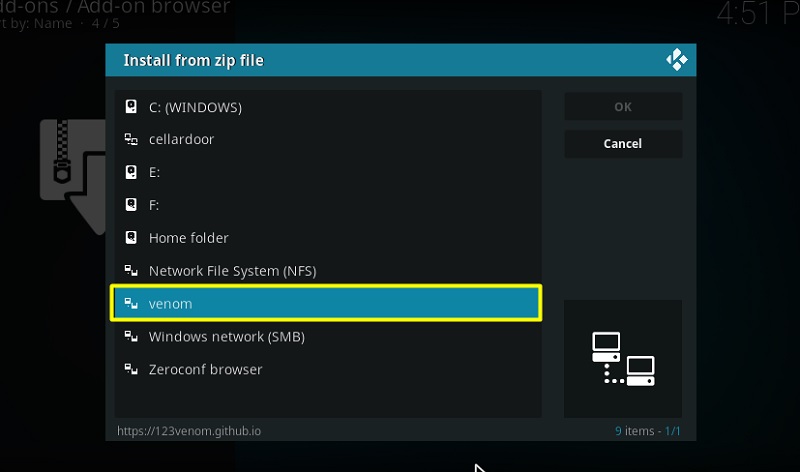
- Select Install from zip file from the options, then select Venom.
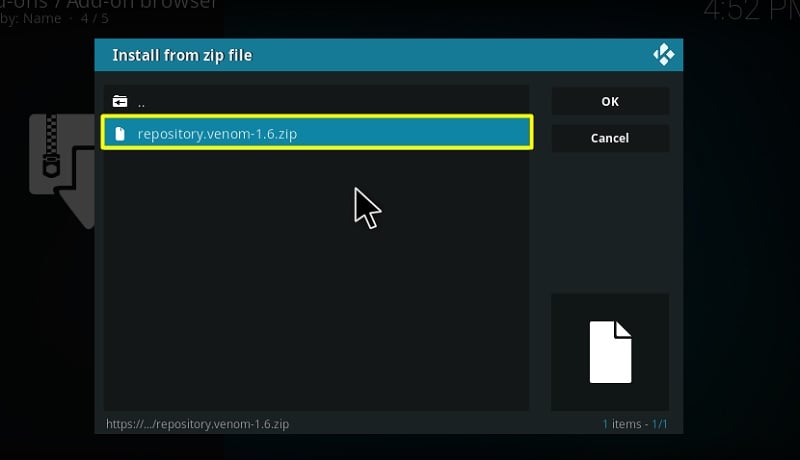
- Select the venom-1.6.zip file in the parent directory to install the Venom Repository. You will get a notification above once it is successfully installed.
Part 3: Install the Venom Addon
- Return to the Add-ons / Add-on browser page to select Install from repository.
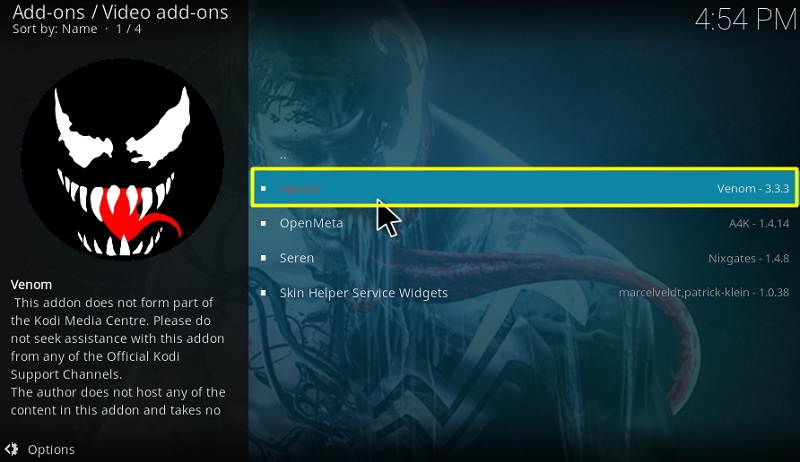
- Click Venom Repo > Video add-ons, then select Venom.
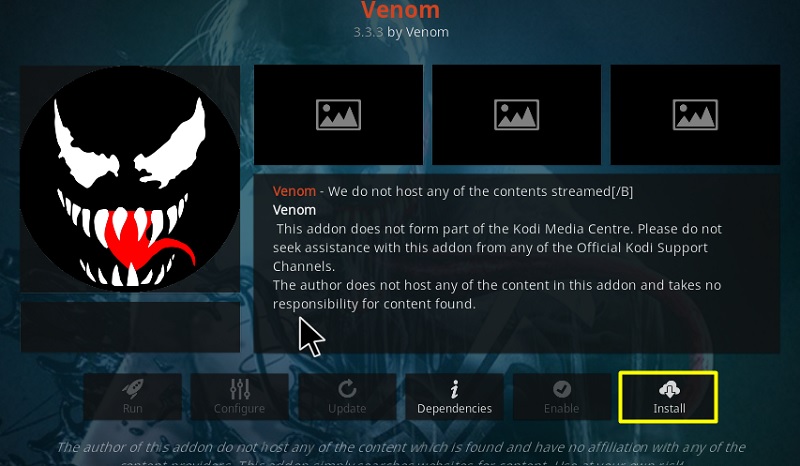
- Click the Install button below the add-on description. Kodi v18 Leia users will encounter a pop-up to confirm the installation of additional add-ons. Simply click OK to confirm.
Reasons to Use a VPN for Kodi
Read this before you begin your streaming session with Kodi add-ons. When you stream from an open streamable source, your IP address and web activities are exposed on the web, leaving you vulnerable to hackers and phishing attacks. Some countries have enforced strict protocols for banning people from watching copyrighted content for free. This means you can face legal issues for streaming with third-party Kodi add-ons.
A VPN will safeguard you from these problems. It encrypts your upstream and downstream data, transmits it via a private DNS server, and masks your real IP address with a decoy IP address. Your Internet Service Provider and government firms won’t be able to track your web activities anymore. You can also get access to geo-restricted content by connecting to VPN servers in different countries.
Our experience with IPVanish VPN has been quite delightful. It is available for Windows, macOS, Linux, Android, iOS, and Fire OS devices. The VPN has IPV6 and DNS leak protection and uses bank-level AES 256-bit encryption to secure your internet connection.
IPVanish comes with a 7-day money-back guarantee, so you ask for a refund if you don’t like it. We didn’t have any issues with IPVanish and you probably won’t have too. In case you want to try it out, follow the steps below.
- Visit the official IPVanish website and sign up for a subscription.
- Download and install the IPVanish VPN app on your preferred device.
- Launch the app and log in with your IPVanish account.
- Connect to a VPN server of your choice and enjoy streaming on Kodi.
How to Use Venom Kodi Addon?
- Once you install the Venom addon on Kodi, head over to Add-ons > Video add-ons to launch the Venom add-on.
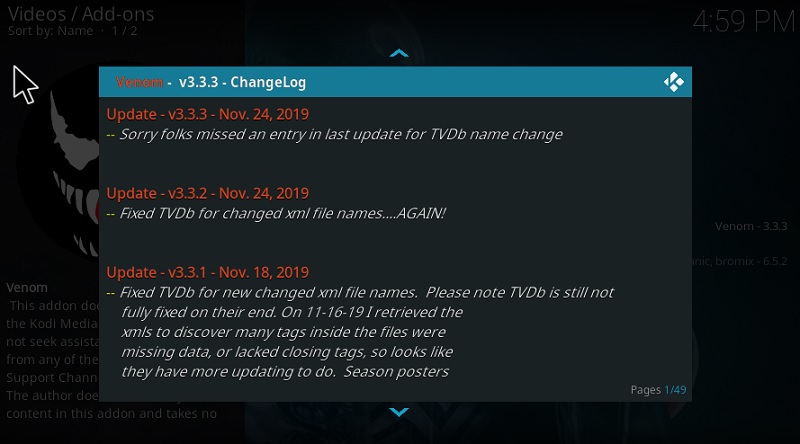
- Launching the add-on for the first time will show you the version changelog. Just click the blank space or tap the Back button on your remote to skip it.
- The main window of Venom is made of categories and sub-categories. These are the options you should see in the main window: Movies, TV Shows, My Movies, My TV Shows, New Movies, New Episodes, Recently Aired, Search, Tools, News and Info, and Changelog. If you decide to watch a movie, click Movies or New Movies to see the catalog. All the content is sorted and correctly organized in different sub-categories for your ease.
- You can also use the Search option to find the movie or TV show you want to watch.
That’s all For now! You may like my recent post about Best Kodi addons where I have listed Top 20 Working Kodi addons to watch movies, TV shows, and sports for free. See you in the next article.!
Related
